Using Facebook’s Certificate Transparency Tool to detect phishing
Signed SSL certificates are handed out by trusted organizations for specific domains to verify to the end user that the server is who they say they are. Many browsers display a lock symbol to indicate that the content is being served over the encrypted HTTPS protocol and will not display errors or warnings if the certificate was issued legitimately (ie., not self-signed). However, anyone can acquire domains and signed SSL certificates for little-to-no-cost, including the bad guys.
To aid in transparency and help with unapproved certificate handouts, web browsers like Chrome are beginning to require that all certificates are placed into what is referred to as a certificate transparency (CT) log. There are quite a few official log locations for these certificates. These logs contain the time/date of issuance, as well as the domain and certificate authority that issued said certificate.
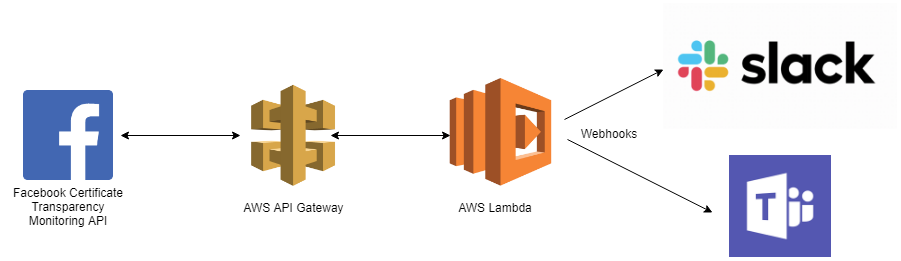
Facebook introduced their Certificate Transparency Monitoring tool in 2016 and added support for Webhooks in 2017. Their tool checks against numerous CT logs and can send email, push, and webhook notifications for any domain that a user wishes to track. In addition, and what will be the main focus of this post, the tool also has capability to detect suspicious domains similar to a given domain that could be used for phishing.
Phishing Domain Monitoring
Domains are human readable addresses that we implicitly, and perhaps subconciously,
place trust in. A link to download a file from 172.217.11.238 is much more alarming
than drive.google.com. Attackers use trusted domain names to trick and phish
victims, usually via email.
Attackers can perform a number of domain “tricks” to register what look almost exactly like legitimate domains from a trusted company.
According to Facebook’s blog post, they can detect the following phishing domains:
Homograph Attacks
An attacker can register a domain that appears the same, but consists of different unicode characters.
For example: faceb00k[.]com: the letter o’s in facebook are replaced by the
number zero.
Another example: facebook[.]com: the letter о is actually the Cyrillic small
letter o (0x43E), not the Latin o (0x6F).
Typo-squatting
Similar domains that have typos can look like the real thing at first glance, prompting victims to trust a link.
For example: gooogle.com
Mobile Screens
Mobile browsers often show only the first part of a domain in the URL bar if the domain is too long. Therefore, an attacker can register a long domain name and use subdomains to trick users.
If I registered xxxxxxxxxxxxxxxxxxxxyyyyyyyyyyyyyyzzzzzzzzzz.com, I can create a
DNS record for google.com.xxxxxxxxxxxxxxxxxxxxyyyyyyyyyyyyyyzzzzzzzzzz.com and
on some devices it is possible that only google.com would actually be displayed
in the URL bar.
Combo squatting
Attackers can register domains with a trusted site’s name in combination with some other item.
For example, XYZ Fake Corp’s domain is xyzcorp.com. I can register
it-xyzcorp.com and impersonate the IT department in my phishing emails.
Using Facebook’s Phishing Detection Tool
Now that we’ve seen what the tool is capable of detecting from the CT logs, let’s look at how we can use their API to generate alerts for us in Microsoft Teams or Slack. This post only has code for MS Teams webhooks, but the process is very similar for Slack.
Milestone 1: Creating the Webhook Facebook App
- Before using Facebook’s APIs, we’ll need a Facebook account. If you do not already have one, you must create an account and log in to proceed.
- Head to Facebook’s developer site and select
My Apps–>Add New App. You’ll be prompted for App ID info including an app name and contact email. Just fill these out with whatever seems right to you.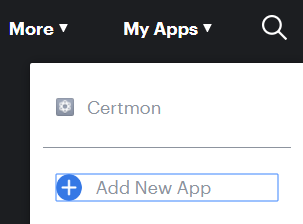
- You’ll be redirected to the Facebook App dashboard. On the left side of the page,
click the + symbol by
Productsand scroll until you find the Webhooks. SelectSet Upto begin configuring our Webhook service.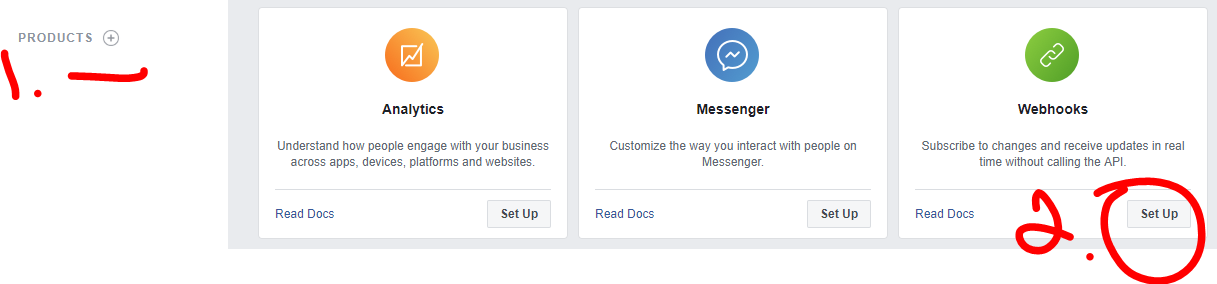
- Click
Subscribe to this object. You’ll be prompted for a Callback URL (ie., what Facebook will post alert information to) as well as a security token. Since we don’t have this information now, let’s leave this page be and head to the next milestone.
Milestone 2: Setting up our API gateway and Lambda Function
In case you’re unfamiliar with AWS Lambda functions, they are functions of code that you write and place into Amazon’s cloud. You do not set up a VM/EC2 instance to run your code in. Instead, there are hooks that call your code (for example, an API endpoint being hit) and you are charged only for the time that your code is actually running. This not only saves you money, but you have to manage no infrastructure whatsoever.
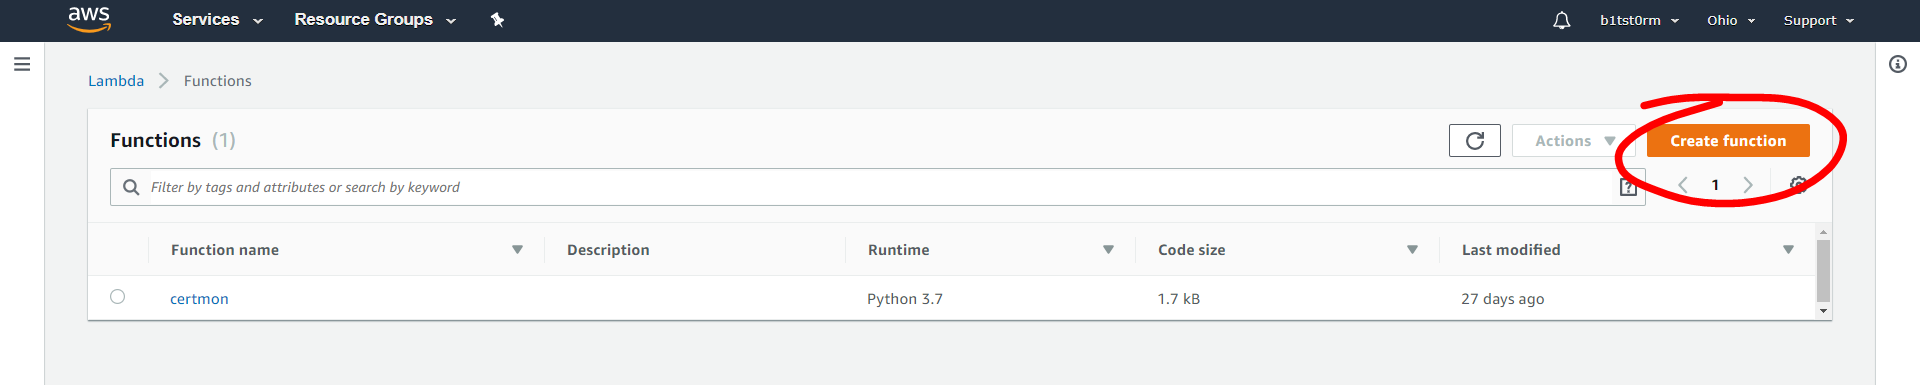
- Log into AWS with your account and search for Lambda. Hit “Create function” in the
Functions tab seen below.
- On the Create Function page, give the function a name and choose your runtime language. I’ll be using Python 3.7 in this post. I accept the default Permissions for now.
- In the Designer section of your newly-created function’s dashboard, choose API Gateway under Add triggers. A trigger is essentially an event that causes your Lambda function code to run. In this case, we will set up an API such that when the API endpoint is hit, our function consumes the request data from Facebook and posts to a Teams webhook.
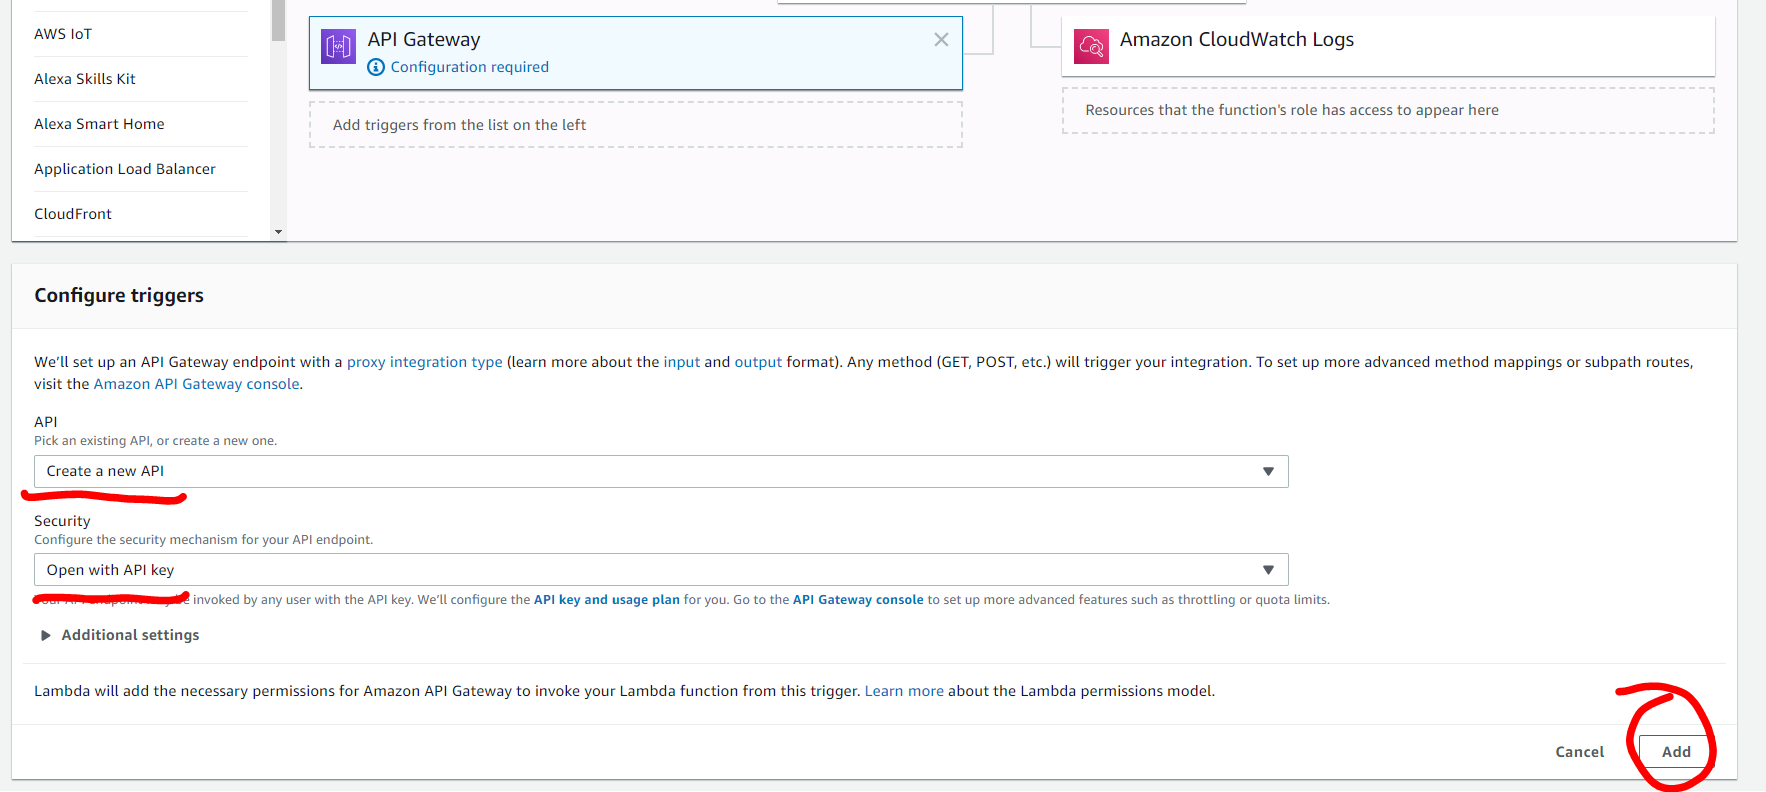
- If you scroll down a bit, you’ll see the Configure triggers section. Select
“Create a new API”. Under Security choose “open with API key.” Hit Add in the lower right corner,
followed by the orange Save button in the upper right hand corner of the page.
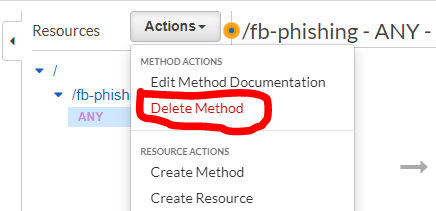
- Click on the link to your API Gateway in the API Gateway panel, or click Services
and type API Gateway at the top of the page. We want to delete the ANY method for the gateway
which will accept any HTTP method.
- Next we will add GET and POST methods to our API gateway:
- Under Actions, select Create Method and select “GET” from the dropdown.
- In the setup pane to the right, select Lambda Function for Integration type and check “Use Lambda Proxy integration” so we can receive the request details in our function.
- In the Lambda Function section, start typing the name of your new function and select it once it appears.
- Finally, hit the Save button in the pane.
- Repeat these steps for POST.
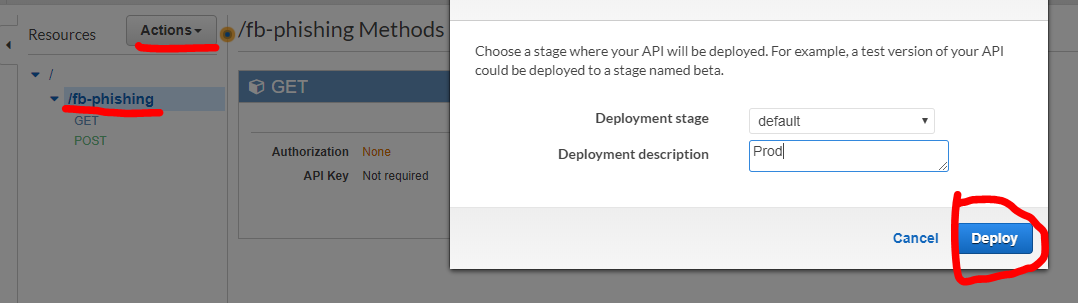
- We need to deploy the API to use it. Select the name of your API, then hit
Actions –> Deploy Api. You can select “default” stage and hit deploy, and you’ll
be redirected. Select the dropdown on default and click your API name.
Note the “Invoke URL” as we’ll use this in the next milestone.
- Head back to the Lamdba function via Services –> Lambda dropdown in the upper left corner. You should only see two listings in the API Gateway panel now, one for GET and one for POST. If there are more, delete the extraneous ones.
Milestone 3: Writing the Lambda code
Our Lamdba function will take Facebook’s alert data from our API endpoints and relay that information in a readable context to Microsoft Teams. We’ll use Python in this post, but Javascript or any other supported language by Lambda will work just as well.
The full code is available here, so feel free to copy and paste that into your function editor now, and I’ll walk you through it step-by-step.
import json
import logging  # for CloudWatch logs
from botocore.vendored import requests
from datetime import datetime

TEAMS_ENDPOINT = "SET THIS (ie., https://outlook.office.com/webhook/...)"
SECURITY_TOKEN = "SET THIS"
This first chunk of code imports some necessary modules. We’ll set up logging
using AWS’s CloudWatch for monitoring and debugging purposes later.
You’ll need to set TEAMS_ENDPOINT to your Microsoft Teams Webhook URL.
Let’s fetch that now. Head to your Microsoft Teams application (web or desktop).
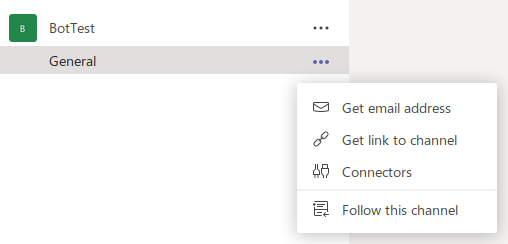
- Select or create a channel that you’d like to use for the alerts to be posted in. I chose General.
- Next, select the menu to the right of the channel and click “Connectors”.
- Search for “webhook” and click “Configure” on the Incoming Webhook option.
- On the next screen, give your webhook a name and optionally a profile picture. I named mine “certmon-test”.
- The same dialog box will refresh and you’ll see a box with a URL in it. Copy that URL, it’s what we need to set TEAMS_ENDPOINT to in our Lamdba code.
- Now you can hit “Done” on the Teams dialog box.
Set the SECURITY_TOKEN in your Lambda function code to (ideally) a
randomly-generated string of any size. You’ll configure your Facebook app
later with this access token.
TEAMS_CARD = """
{
    "@context": "https://schema.org/extensions",
    "@type": "MessageCard",
    "themeColor": "FF0000",
    "title": "Alert: Potentially Malicious Domain Discovered!",
    "text": "Facebook Certificate Transparency Monitoring System has detected a new SSL certificate issued for what looks to be an illegitimate domain similar to ",
    "sections": [
        {
            "startGroup": true,
            "title": "DOMAIN: **mal.blah.d.com**",
            "facts": [
                {
                    "name": "Date submitted:",
                    "value": "06/27/2017, 2:44 PM"
                }
            ]
        },
        {
            "startGroup": true,
            "potentialAction": [
                {
                    "@type": "OpenUri",
                    "name": "Learn more about Facebook Certificate Transparency",
                    "targets": [
                        {
                            "os": "default",
                            "uri": "https://developers.facebook.com/docs/certificate-transparency/"
                        }
                    ]
                }
            ]
        }
    ]
}
"""
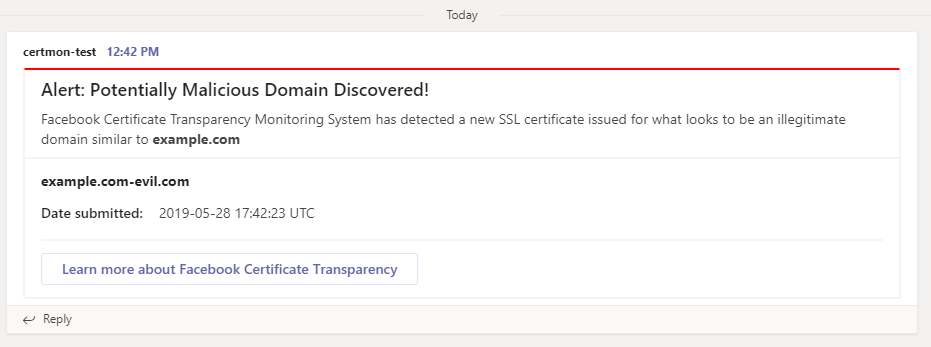
Above is JSON output representing the design and layout of how the alert will look in Microsoft Teams. Feel free to edit this by using Microsoft’s online editor playground and documentation, but it should work out-of-the-box for you.
Next I configure a logger for AWS Cloudwatch. This isn’t neccessary, but if you’d like to log Lambda usage for debugging purposes it is very helpful:
logger = logging.getLogger()
logger.setLevel(logging.INFO)
Now for the juicy part: the actual “Lamdba function” that is called when
our API gets data from Facebook. The request data is stored in a variable
called event containing JSON data. First I define the function and perform
some logging:
def lambda_handler(event, context):
    logger.info('got event {}'.format(event))
    retval = json.dumps(event)
If you dig into Facebook’s API docs, it states that the API periodically sends
a GET request to verify our endpoint is up and working. We check their
verify_token value against our SECURITY_TOKEN and if they are the same,
we respond with a 200, letting Facebook know we are alive and ready to
receive info.
    if (event['httpMethod'] == 'GET'):
        if (event['queryStringParameters']['hub.verify_token'] ==
                SECURITY_TOKEN):
            logger.info('API GET call successful')
            return {
                'statusCode': 200,
                'body': event['queryStringParameters']['hub.challenge']
            }
        else:
            logger.error('API GET call failed')
            return {
                'statusCode': 400,
                'body': 'Something went wrong'
            }
The only other type of request we should receive from Facebook is a POST.
The POST requests are Facebook sending us alert info. Below we handle this
by extracting the alert info and sending it to another function to
create a new MS Teams message for each phishing domain. Finally, we respond
to Facebook with a 200.
    elif (event['httpMethod'] == 'POST'):
        # Fetch the JSON body from Facebook
        body = json.loads(event['body'])

        try:
            # If more than one alert in the payload
            changes_value = body['entry'][0]['changes'][0]['value']
            domains = changes_value['phishing_domains']
            original_domain = changes_value['phished_domain']

            for domain in domains:
                time = datetime.utcfromtimestamp(
                    int(body['entry'][0]['time'])
                ).strftime('%Y-%m-%d %H:%M:%S') + " UTC"
                relay_alert(original_domain, domain, time)

        except KeyError:
            # If just one alert in the body
            mal_domain = body['value']['phishing_domains'][0]
            original_domain = body['value']['phished_domain']
            time = datetime.utcfromtimestamp(
                int(body['time'])
            ).strftime('%Y-%m-%d %H:%M:%S') + " UTC"
            relay_alert(original_domain, mal_domain, time)

        return {
            'statusCode': 200,
            'body': 'success'
        }
If we get any other type of HTTP request, we log it and respond with a 400:
    else:
        logger.error('Invalid HTTP method hit')
        return {
            'statusCode': 400,
            'body': 'Invalid HTTP Method'
        }
The last piece of our code is the function to generate an alert in MS Teams. Here we load the JSON for the Card, change the values with our new intel, and fire off a POST request to the Teams endpoint configured earlier:
def relay_alert(orig_domain, mal_domain, time):
    """
    Given the original domain, malicious/phishing domain, and time of
    occurrence, sends an alert to Teams endpoint using a formatted Card.
    """
    card_to_send = json.loads(TEAMS_CARD)
    card_to_send['text'] += '**' + orig_domain + '**'
    card_to_send['sections'][0]['title'] = '**' + mal_domain + '**'
    card_to_send['sections'][0]['facts'][0]['value'] = time
    json_teams_str = json.dumps(card_to_send)
    r = requests.post(TEAMS_ENDPOINT, data=json_teams_str)
Milestone 4: Final Facebook Config
We now have our Lambda function ready and API endpoints to feed into our Facebook app.
- Open up
https://developers.facebook.com/and head to your app we made earlier. - Under Products –> Webhooks, select “Subscribe to this object” with “Certificate Transparency”
being selected. A popup dialog will appear. For
Callback URLinput your Invoke URL from AWS. It should look something like:https://XYZ.execute-api.us-XYZ-N.amazonaws.com/default/YOURAPINAMEHEREForVerify Token, paste in the value ofSECURITY_TOKENvariable in your Lambda Function. Clicking Verify and Save will fire off a test to ensure the endpoint is functioning. If everything goes well, the dialog box will close without error. - Under phishing hit Subscribe. The Lambda code is written to work with API v3.3.

- In order for Facebook to send us alerts, we must make our app live. Click the
slider in the upper-right-hand corner. If you are prompted to add a privacy policy
URL, add one in and try again. Once live the slider will turn green like below.

- Now hit “Test” by phishing. Facebook will send a test alert and you should
see a new message in Teams.
That’s it.
Organizations and teams across the world can use this free API service to monitor their domain(s) and be made aware when certificates with domains suspiciously similar to theirs are generated. This may help you get a head start on response to a malicious phishing campaign, especially nasty spearheaded ones.
Github Repo: https://github.com/b1tst0rm/certguard
Questions? Comment below!
~ b1tst0rm (Daniel)